User and role management
User Management
Adding New Users
- Have users log into Superset using the sign-in method configured for your deployment, such as Google Sign-In or another SSO provider.
- Superset may initially assign them a limited role such as
Gamma, which usually will not give them access to the dashboards they need. - If the username is generated by your identity provider, do not change it unless you are certain your authentication setup allows that change. In many deployments, changing the provider-generated username can prevent future sign-in.
- Superset may initially assign them a limited role such as
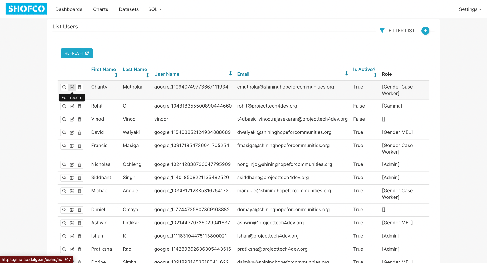
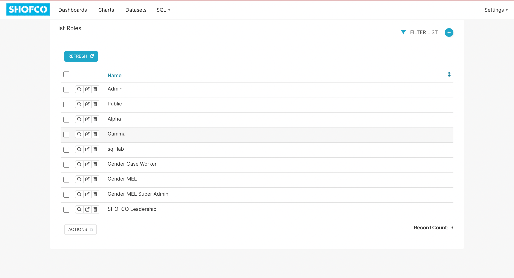
- An Admin will then need to manually assign the correct role. Navigate to Settings > List Users.
- You should be able to see users who have logged in through your configured authentication provider. New users may appear with minimal profile details, a limited default role, and a provider-generated username. If your SSO configuration depends on that generated username, do not change it without verifying the impact on future sign-in.
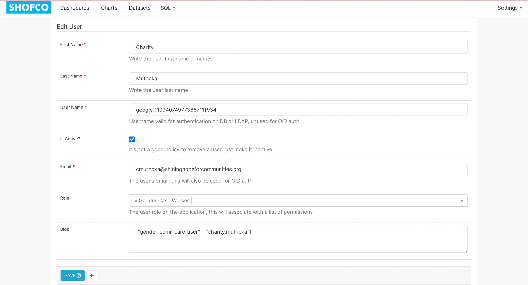
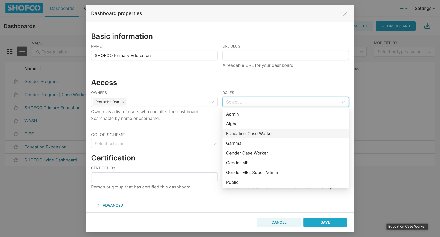
- Find the user in the list, and click on the pencil icon to edit their record
- Add in the First Name and Last Name of the User.
- Ensure the Is Active checkbox is ticked
- Update role as needed from ‘Gamma’ to whatever the User’s role is supposed to be. Users can hold multiple roles to combine permissions.
- Update the blob according to necessary row level security, and if row level security is not needed for their role, leave it blank. (Row Level Security discussed below)
- Save changes.
Deactivating Users
- Locate the user under Settings > List Users.
- Select Edit (the pencil icon), then mark the user as inactive by unchecking the Is Active checkbox.
- Confirm and Save.
Role Management
Understanding Roles
- Superset uses roles to manage permissions. Roles include built-in ones like Admin, Alpha, Gamma, Public, etc.
- Custom roles can be created for specific user needs or team-based access control.
Creating a Custom Role
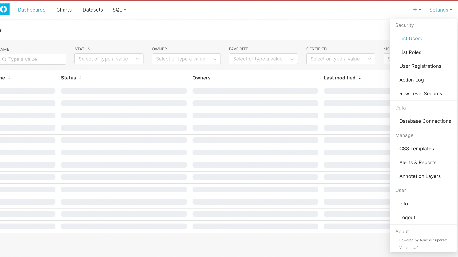
- Navigate to Settings > List Roles.
- Click on the (+) icon on the top right to add a new role.
- Name the role according to its purpose (e.g., “Site Coordinator” or “Education Case Worker”).
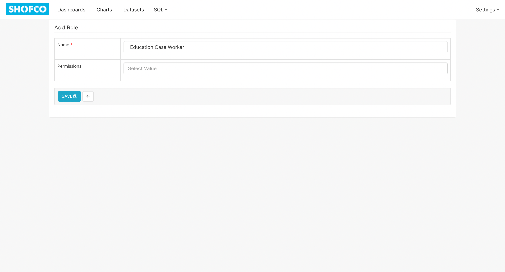
- Define permissions by selecting options from the drop down in categories such as Database Access, Dataset Access, and Chart Access.

- Save the new role.
Assigning Dashboards to Roles
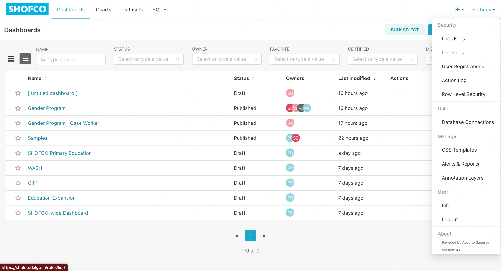
- Go to the Dashboards tab in the top menu
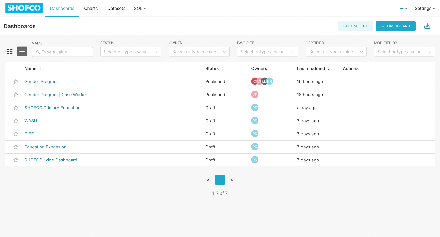
- Hover over the dashboard you want a role to be able to access, and click on the Edit (pencil) icon that shows up
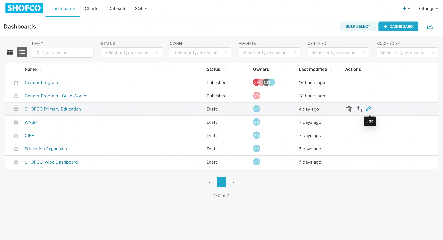
- In Roles, select the role you want to assign the dashboard to in the dropdown menu
-
Click Save
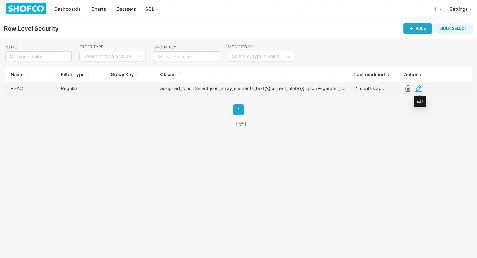
Row Level Security
Activating and Setting up Row level Security
- Go to Settings > Row Level Security to view, create and edit row level security options

- Click on the + Rule button to add a new row-level security rule, or hover over an existing rule and click on the Edit (pencil icon) to edit it
- Give the role a unique name and fill out the Clause textbox with an SQL statement that reads the relevant field from a JSON string stored in the user Blob.
- For example, the SQL clause below filters the Gender Program | Case Worker dashboard so it only shows data for the current case worker:
assigned_to in (
  select json_array_elements_text('{{current_blob()}}'::json->'gender_commcare_user') as assigned_to
)
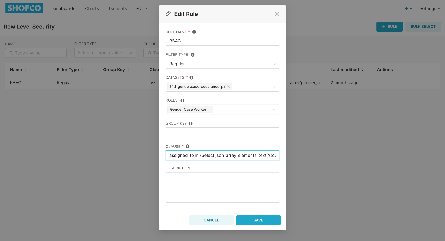
- Click Save
Filling out the Blob
- When editing a user, you can fill out the blob with the relevant information for the user, that we have set up row level security to read.
- In the example above, we set up Row Level Security to read the field “gender_commcare_user” from the JSON String in the User��’s blob
- Navigate to Settings > List Users.
- Find the user in the list, and click on the pencil icon to edit their record
- On the Edit User Page, fill out the Blob textbox with the JSON string containing the
commcare_idor any other field you want to filter access by.- For Case Workers accessing the Gender Program | Case Worker table, we will fill it out as below:
{"gender_commcare_user": ["commcare_id"]}
Best Practices
- Limit Admin Role: Restrict the Admin role to only those users needing full access and control.
- Use Custom Roles: Create roles aligned with job functions to simplify permission assignments.
- Review Periodically: Periodically review and audit user roles and permissions to maintain security.
- Document Changes: Maintain a log of role assignments and permission changes for accountability.
- Avoid Deleting Users: Deactivate them Instead